Posted in Products with tags Targus on April 28, 2025 by itnerd
Not long ago, I switched from a laptop bag that was literally falling apart to this Targus backpack. There’s nothing wrong with this backpack at all, but thanks to Targus, I now have an upgrade. They sent me the Terra EcoSmart 15-16″ backpack recently which looks like this:
This has a pretty modern and contemporary look to it which I like. And it’s a bit like the TARDIS. It’s bigger on the inside than on the outside. Let me illustrate that:
The very front pocket has a keyring for your keys.
One cool feature is that it has this flap that makes the zipper difficult to unzip. Handy for places like Downtown Toronto which has a bit of a petty crime problem.
There’s an expandable pouch on each side of the backpack for water bottles.
On the back of the backpack is a zippered compartment that holds a rain cover for the backpack. Handy if you use this backpack to cycle to and from work. Speaking of cycling…
It has a pair of hooks on the front which you can use to do this:
You can hang your helmet on the backpack securely thanks to those hooks. Meaning that it’s one less thing that you have in your hands or inside the backpack.
And there’s loop at the bottom front of the backpack that allows you to hang a rear light so that you are always safe when cycling.
Pro tip: I always use front and rear lights when cycling. Daytime, night time, it doesn’t matter. You should too as it will help you to stay safe.
One of the straps has a slot for a card like a bus pass or in this case, my CAA card which I am using for demonstrating purposes.
Around back there’s a mesh like weave to keep your back cool, and a strap that allows you to slide the backpack through your luggage.
The middle compartment really has a lot of space. I’ve tossed my business cards, a pen, a paper notebook and a pack of tissues in it. But I can also throw my tech sling in here with ease and have lots space left over.
The laptop compartment is very well padded and fit my 16″ MacBook Pro with no issues. One thing to note that the bottom of this compartment is suspended off the ground. Meaning that putting your laptop down will not damage your expensive computer.
Targus gets bonus points for having this zipper for the laptop compartment that locks. Meaning that stealing your laptop is now harder to steal.
Other notes about this backpack include:
I sprayed some water onto the fabric and it beads. Meaning that at the very least it is water resistant. Handy if you live in a place where it rains a lot. The zippers also appear to be water resistant as well.
8 plastic bottles were used to make this backpack. Meaning that by buying it, you’re helping the environment.
So is it perfect? Well, the only thing that I would improve is that I would have added a hidden AirTag compartment into it. Thus to put an AirTag in this backpack, I had to improvise by using one of these to hide it in a place were nobody would look for it. Having said that, Targus does make a backpack with FindMy functionality. So if you want some sort of tracking ability in your backpack, that’s an option for you.
The Targus Terra EcoSmart 15-16″ backpack goes for $70 MSRP. And you get a fair amount for your money including some cyclist friendly features. Which is why I will be using this backpack going forward. While I don’t use my bike to commute, everything else about this backpack is top shelf as far as I am concerned.
Posted in Products with tags TP-Link on April 15, 2025 by itnerd
WiFi 7 is quickly becoming mainstream. I say that because all sorts of new WiFi 7 hardware options are coming onto the market every time I look around. Today’s example of this is the TP-Link Archer GE800 BE19000:
The first thing that came to mind when I saw this was that it looked like an Imperial Shuttle from Star Wars: Return Of The Jedi. But this shape does give it some party tricks for your enjoyment. Before I get to those, you get buttons on the front that do the following easily:
Game Acceleration. This accelerates game applications, game devices, mobile games, and the like with WTFast GPN.
Turning on/off the LED lights
I am going to assume that the antennas are in each “wing.” But that’s not all that’s in them.
There’s RGB lighting on the sides which you can tweak with via the TP-Link Tether app.
Not to mention that there’s RGB lighting on the bottom as well. Now I had to turn these off during my testing as my wife thought that it was beyond over the top and ordered me to disable all of it the second she saw it. So for those of you who have significant others, you might want to keep that in mind and proactively turn the RGB effects off.
Here’s the business end of the router. Besides a USB 3.0 port for a storage device like a hard drive, you get two 10 Gbps ports. One of them is a LAN port, the other is a combo WAN port which gives you the option of running an SFP+ module. So if you have fibre Internet and you don’t need to use an optical networking terminal like I do, you can plug the fibre cable straight into the router for maximum speed. Nice! There’s also four 2.5 Gbps LAN ports but one is a dedicated gaming port. Meaning that any device connected to this port will be automatically prioritized. Which in turn means that it will give you that extra millisecond or two to pwn n00bz.
With the looks and connectivity out of the way, let’s get to the WiFi part of this. This is what you get out of the box:
4×4 2.4GHz BE: Up to 1376Mbps (20/40MHz)
4×4 5GHz BE: Up to 5760Mbps (20/40/80/160MHz)
4×4 6GHz BE: Up to 11520Mbps (20/40/80/160/320MHz)
That’s not all. You can create an SSID (network name) for each of the three bands which allows you to support special use cases such as mine where I want all the bands separate to make sure that devices, especially IoT devices have no issues connecting. And on top of that you can create an MLO (multi link operation) SSID for your WiFi devices that support MLO. That was easily done through the TP-Link Tether app. But it also has a web interface that also gives you way more customization if you want to tinker with your router’s setup. I should also mention that this router supports TP-Link’s EasyMesh which allows you to add a compatible TP-Link router to create a mesh network should the need arise.
Set up is going to be easy for most using theTether app. By that I mean that if you have a straight forward Internet connection, you can be set up in under five minutes. But it took me about 20 due to the fact that my Internet connection isn’t straight forward as it uses PPPoE and a VLAN on top of that. Thus I had to spend some time figuring out how to set that up. But once it was set up, and I did a firmware update, I was ready to go with my testing.
Let’s start with 5 Ghz testing. Frankly I wasn’t impressed when I tested this router with my iPhone 14 Pro:
I’ve gotten much faster 5 Ghz speeds with other routers in the past. But my lack of enthusiasm quickly changed when I tested the 6 Ghz band via my M2 Pro Mac mini. When I did that, here’s what I got:
My Internet connection is a symmetrical 1 Gbps fibre connection. So over WiFi it not only came close to maxing out my Internet connection, but it also recorded the fastest speeds from a router that I have ever tested. Or put another way, if I had a faster Internet connection, This TP-Link router has the headroom to support it. Impressive. And range wasn’t an issue as I was getting insanely fast speeds through walls and even outside my condo in the hallway.
Gripes? Well for starters, this router has a fan to keep things cool. Which it needs as I could feel the heat coming out the various vents that the router has. Now I had to really make things quiet to come close to hearing the hum it made. And to be clear that hum wasn’t objectionable. But I have to wonder if that fan will survive the test of time as any moving part in any device will eventually fail at some point. My advice is to make sure it’s in an open space so that heat and the potential of a fan failure less of a potential issue.
My other gripe is that features like Security+ which makes your router more secure by implementing features like intrusion detection and prevention as well as scanning your web traffic for harmful content such as malware, as well as parental controls are paid subscription services. That’s a bit of a #fail and I say that because ASUS for example just tosses these features into the cost of the router. While that does make ASUS routers more expensive than the TP-Link equivalent, at least you those features out of the gate and don’t have to sign up for yet another subscription to get those features. Plus it makes users more secure in the process as users will simply turn on those features rather than think about taking out their credit cards in order to be as secure as possible.
The TP-Link Archer GE800 BE19000 is currently $900 on Amazon.ca which is a good price for a router that performs this well. If TP-Link added the security and parental control features as part of the price, or increased the price of the router to include those features by a reasonable amount, it in my mind would go from a great router, to an almost perfect router as I really didn’t find any flaws with it. That makes this router worth a look if you are a gamer, or you have an Internet connection that can fully leverage it.
Posted in Products with tags Samsung on April 14, 2025 by itnerd
I’ll get right to the point. The Samsung Galaxy S25 Ultra is the best phone money can buy right now. And you’ll need less money to score one as of last week when Samsung cut the price. Let’s start with the design of the phone itself.
It’s a flat sided phone just like every phone seems to be these days. The thing is, that it felt really comfortable to hold in my hand, and didn’t have any sharp edges that I could feel. And despite being a big phone, it didn’t feel big. The screen also has really thin bezels as well as being bright, clear and fluid. So far I have zero complaints.
The back is where things get interesting. The Galaxy S25 Ultra features a 200MP main camera, a 50MP ultra-wide lens, and two telephoto lenses (50MP with 5x optical zoom and 10MP with 3x optical zoom), along with a 12MP front camera. And these cameras are top shelf. Let me show you three photos. Starting with a 12 MP photo:
Followed by a 200 MP photo:
Both of these photos really look good and detailed. Let’s try something different. As in a photo where I did a semi – macro shot to get this picture:
There is some blur, but it’s pretty decent. How about zoomed in photos?
It’s a weird place to see a pair football cleats, but this photo is pretty clear. Here’s a lower light shot.
Again, there’s nothing to complain about when it comes to this photo. Let’s move over to video. Here’s a 4K HDR video for you to look at:
Followed by an 8K video:
Both videos look good. But I have to say that the 4K video looks sharper than the 8K video. Likely because the 8K video is shot at 30 fps which is what the max that this phone will do at this resolution. But I seriously don’t think you’ll complain.
I usually don’t do speed tests because they are kind of meaningless at this point. Phones in general are pretty fast these days with iPhones tending to be at the top of the food chain. But the S25 Ultra isn’t too shabby putting in a Geekbench single-core score of 2,099 and a multi-core score of 8,103 from the Snapdragon 8 Elite processor. As for all the AI stuff that the phone comes with, let me boil it down to this:
The now brief that gives you an overview of your day wasn’t useful to me.
Gemini was pretty good as it allowed for conversational AI that was useful to me. Plus I can use the camera to identify objects. That’s something that I did use a few times with good results. It also goes without saying that this destroys Apple Intelligence without trying too hard.
Let’s move over to some complaints if you want to call them that. I’ll start with battery life. This phone can make it through the day. But just barely. I suspect that it has to do with the fact that it has a 5000 mAh battery and the Snapdragon 8 Elite processor isn’t exactly power friendly. A bigger battery to take you late into the night would have been welcome. Then there’s the S Pen. Some have complained that because Bluetooth support in the S Pen is gone, that hobbles the S Pen. I disagree because in my week and a bit that I used the S25 Ultra, I never used the S Pen once. So I have to wonder should it even be there in the first place as I didn’t really encounter a situation where I needed to use it. Comment below and share your thoughts on that if you are an S Pen fan.
Finally, there’s the price. The starting price of the S25 Ultra is normally $1,918 with 256GB of storage. That is pretty pricey, but after last week’s price cut, I am guessing that this will spur sales. Which means that if you want an S25 Ultra, now would be a good time to get one. It has a great set of cameras, it has decent battery life, AI features that are useful, and a build that is top shelf. You honestly can’t go wrong with this phone.
Posted in Products with tags EnGenius on February 17, 2025 by itnerd
The planet has really started to embrace WiFi 7. And companies are trying to get products out there that fill that need. EnGenius is no different as they have released the ECW516L which rolls up with the following WiFi specs:
6 GHz: 3×3 BE with up to 8,700 Mbps (20/40/80/160/320MHz)
5 GHz: 3×3 BE with up to 4,300 Mbps (20/40/80/160MHz)
2.4 Ghz: 2×2 BE with up to 700 Mbps (20/40MHz)
In terms of looks, it doesn’t look any different than any other EnGenius WiFi access point that I have reviewed. Though I will note that it does seem to be a bit thinner than I am used to.
Being a PoE product, there’s no power adapter in the box. And the Ethernet port that is included is a 2.5GB PoE+ port. That’s way less than the speed on the WiFi side of things which makes the inclusion of a port that runs at this speed a bit of a head scratcher. I would argue that this access point is a lower priced alternative to some other access points that are way more expensive than this. And if you really need lots of speed from your backbone to the access point to the client, EnGenius has the EnGenius Wifi 7 2x2x2 ECW526 Access Point for you to buy instead as that has a 10GB PoE+ port. And that’s a bit faster as well on the WiFi side of things.
As is typical for EnGenius products, it’s trivially easy to set up and manage via the web based portal or via their app which is on Android and iOS. And neither option requires a subscription. But let’s get to the speed testing as that is the only thing that really matters. In my case, I don’t have a WiFi 7 device handy to do some tests, but I do have an M2 Pro Mac mini that has WiFi 6E which support the 6GHz band and I got the following results:
1 Meter from the access point: 1.01 Gbps per second
5 Meters from the access point: 912 Mbps per second
10 Meters from the access point: 763 Mbps per second
In short, this access point with the Mac mini is still capable of maxing out my 1 Gbps symmetrical Internet connection under the right conditions. Thus I would recommend this access point to “prosumer” home users or a small business given what I am seeing here. And the price that EnGenius is selling it for reinforces that. You can get it directly from them for $199 USD. If you’re building out your home network or you’re a small business that wants to have WiFi 7 at a lower price, this access point is totally worth your time to look at.
Posted in Products with tags Asus on January 30, 2025 by itnerd
Since I reviewed the ASUS RT-BE86U and discovered how fast it was at routing traffic to and from the Internet, it made me think that I could use it improve my connection to the Internet. You see, back when my ISP of the moment was Bell and more recently with Distributel, I’ve had issues maximizing the speed that I was getting from my Internet connection. With Bell I had to bypass their hardware using some really complicated methods to do so. And when I moved to Distributel, I suffered from the PPPoE speed limitations of the hardware that I was using, which was the ASUS ZenWiFi XT8.
I started to research how I could do this in a cost effective manner because after all, networking gear is expensive. After some research, I soon came up with a way to leverage my existing ZenWiFi XT8 gear while using the RT-BE86U at the same time. Let me lay it out graphically for you and then go down the rabbit hole in terms of my logic:
My plan was to use the RT-BE86U as a pure router. As in turn off its WiFi 7 capabilities. Because that would give me 1 Gbps downstream and upstream from the Internet which is something that I do value. Then use the existing Zen WiFi XT8’s with their routing functions turned off to deliver WiFi in my condo. Now you’re likely wondering why I would use a pair of WiFi 6 mesh routers to deliver WiFi. The fact is that the fastest device that I have in my home from a WiFi perspective is a M2 Pro Mac mini that does WiFi 6E. And while it is capable of maxing out my Internet connection on WiFi 7, only having one device that is capable of doing that doesn’t justify making the switch to WiFi 7. Also, while WiFi 6 devices would see a speed boost if I made the switch to WiFi 7, I also value stability above all else. And I knew that this setup works with everything that I own. The final point that I would like to make is that this sort of setup is what I do my business and enterprise clients all the time and is proven to work. Which is to have a fast router connect to the Internet. Then install access points wherever they are needed with an Ethernet backhaul to the router. Though I am deviating from that in my use case. While I have one XT8 connected via an Ethernet cable. That XT8 is communicating to the second XT8 via a wireless backhaul. I’m doing that because I have never been able to run Ethernet cable in the walls of my condo as they are solid concrete. Thus a wireless backhaul setup from the point where my connection to the Internet terminates to the far end of my condo is the only option that is available to me.
Another factor in my decision to go this route is that it leaves open the option of using the RT-BE86U as the base for a mesh setup in the future as it supports the Ai Mesh feature. For example if I wanted to switch to WiFi 7 in the future, I just have to buy a second ASUS WiFi access point or router and add it via a few clicks to the RT-BE86U to create a mesh network. But at the same time I also have the option of doing the WiFi 7 version of what I am about to describe which is to have a pair of mesh nodes set up as access points only. Finally, the fact that I can repurpose the networking gear that I already own to make my network better means that something that I spent a lot of money on doesn’t sit in a box unused while you try to sell it on Craigslist, or worse it ending up as eWaste is a big win for me.
The first thing that I had to do is to configure the router to connect to Distributel via PPPoE. That was easy enough as I had already figured that part out with the XT8’s. Thus I carried that configuration over to the RT-BE86U router. The one issue that I ran into is that I could not get this working on the RT-BE86U’s 10 Gbps Ethernet port when I plugged it into the Nokia ONT (Optical Networking Terminal) that was supplied by Distributel to in layman’s terms convert fibre to Ethernet. But it worked perfectly fine on the 2.5 Gbps port. I found that unusual because the Nokia ONT is at least on paper capable of doing 10 Gbps via Ethernet. I really didn’t go too far down the rabbit hole on this as I have a 1 Gbps downstream Internet connection which meant connecting the ONT to the RT-BE86U’s 2.5 Gbps port is fine. But it was clear that the Nokia ONT and the RT-BE86U couldn’t negotiate a stable 10 Gbps Ethernet connection for reasons that I could not discern. Thus it’s a good thing that the RT-BE86U gave me another option to make this work via having a separate 2.5 Gbps port. And on top of that, I now have a 10 Gbps for the LAN should I need it in the future.
Once I confirmed that I had stable Internet access, I went about locking down the router. Which means doing the following:
I never use any sort of cloud management for the router nor do I expose the admin page to the outside world as those are great ways to get pwned by hackers.
I make sure that the firmware of the router is up to date.
I use a third party DNS service rather than my ISP’s DNS service. At the moment, I am using Quad9 as that blocks threats at the DNS level. And my ISP doesn’t get to monitor my browsing habits and sell that data to third parties.
I disabled PING, Telnet, SSH, and HNAP to make sure that the router isn’t accessible or seen from the Internet.
I then penetration tested it and declared it to be secure. Or at least as secure as I can make it as nothing is ever truly secure these days.
I also turned on the Trend Micro AiProtection feature as I have found over the years that it is effective in terms of keeping my network secure with no noticeable impact to the speed of my network. Now for full disclosure, it does send data to Trend Micro, but I wrote an article as to why that’s a total non issue if that is a concern.
So with that out of the way, I moved onto reconfiguring the XT8 nodes. Prior to this project I had the XT8 nodes set up with one being the router and primary mesh WiFi node, and the other one as a secondary WiFi node connected via using the second 5 GHz band as a dedicated wireless backhaul. Meaning that this 5 GHz connection does nothing other than provide bi-directional communication between the nodes. The first task was that I had to turn off the routing functions as there was no need for these to do any routing, and turn on what’s called access point mode. Meaning that these units are simply access points. To do that, I followed these steps outlined by ASUS which are mostly clear and require you to first factory reset your router. But one thing that I would like to point out is that when you put the nodes in access point mode, the 2.5 Gbps ports on each of the XT8 nodes become uplink ports rather than being WAN only ports. That’s something that this documentation doesn’t make clear and I only found that out when I was doing some testing with this configuration. Thus I used the 2.5 Gbps port on the first XT8 to connect to one of the 2.5 Gbps ports on the RT-BE86U to make sure that I was getting the highest possible speed from the router to the first XT8 node. The other thing that I found is that even though the first XT8 unit got an IP address from the RT-BE86U, I couldn’t access it over the network to do the initial setup. Instead I had to connect to it directly via WiFi to do that. Which didn’t match what the instructions from ASUS had online. Regardless, I was able to get them set up in access point mode. And what was interesting is that both nodes automatically configured themselves. Which is another deviation from the instructions that ASUS provided. I am assuming that this is due to the fact that the XT8’s come pre paired from the factory. Now to be fair to ASUS, the instructions used a scenario that involved a different product and not the XT8. But if I could offer ASUS a piece of advice, they should consider rewriting their instructions to cover a wider variety of use cases.
Pro Tip: When you get to the part about selecting an automatic IP address or manual IP address, always choose manual and pick an IP address that you can remember and document. That way you know what IP address the unit has so that you can log in and do firmware updates or tweak something.
Once I confirmed that everything was working with the XT8 nodes with their factory configuration, I next had to enable the wireless backhaul. That required me to turn on a feature called “Smart Connect” which combines all the bands into a single network that you can see rather than having a distinct 2.4 GHz network and 5 GHz network. But at the same time it turns on the wireless backhaul feature. One I turned it on I had to let the XT8’s reboot, and then turn “Smart Connect” off again which leaves the wireless backhaul feature enabled. ASUS could have made life easier if they split out the wireless backhaul feature from “Smart Connect” as turning on an unrelated feature and then turning it off again to turn on the feature that you want is a bit “janky” as the kids say, but this was only five minutes of time spent to do this so I am not complaining.
Sidebar: The reason why I don’t run “Smart Connect” is that I find that routers that combine the bands into a single network sometimes have issues with devices connecting. By separating them out, I completely avoid that problem. But I will admit that I will have the rethink that when I eventually move to WiFi 7 as part of the reason why you get the crazy speeds that WiFi 7 offers is by having this feature turned on.
I then put in all the tweaks that I have done over the years to make everything from HomeKit devices to specific devices like my wife’s ChefSteps Joule work properly over WiFi. That was a trivial exercise as I had documented all of that up front. Which by the way is something that you should do before embarking on an exercise like this. After that, I turned off the ability for all this hardware (meaning both the XT8’s and the RT-BE86U) to automatically receive firmware updates. To be clear, I do update the firmware on all my gear as firmware updates often bring security fixes and improvements that should be rolled out a soon as possible. But I do it on my schedule so that I don’t wake up one morning to no Internet access or some other weird network issue such as this situation from a few years back.
The second to last step was to shut down WiFi on the RT-BE86U as I would have no use for it. At least not today. This document from ASUS will help you to do that. And the final step is to save the configurations of both XT8’s and the RT-BE86U. This document from ASUS will walk you through doing that. That way if I needed to swap out hardware or I needed to put something back to a known good configuration, I could do that without a problem.
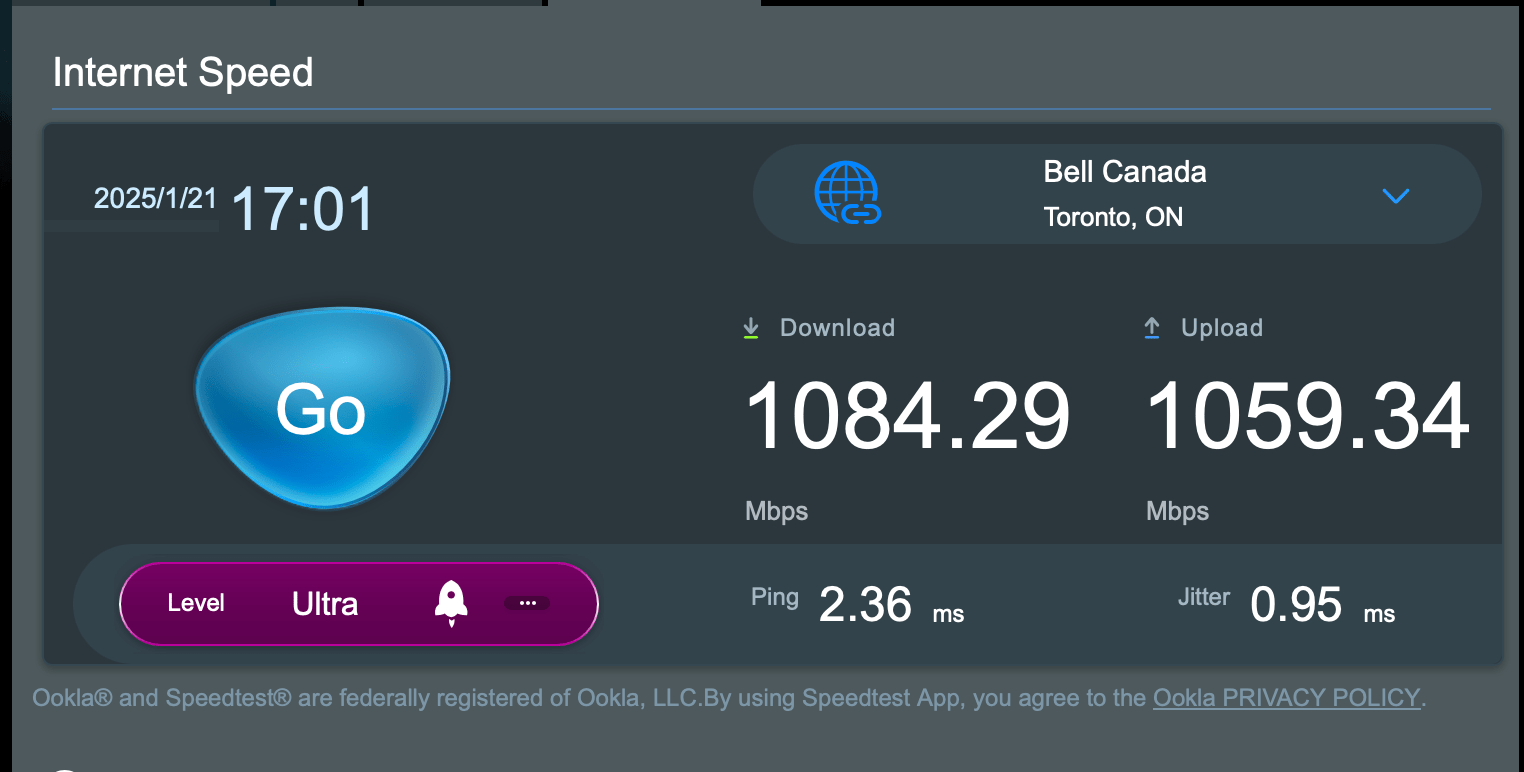
I’ve been running this for a number of days, and while I have not noted any dramatic differences, I can say that there are some “marginal gains” to borrow a phrase from Dave Brailsford (backstory on “marginal gains” here). I do notice that when I do VPN sessions to clients, that those sessions are consistently more fluid. I also notice that MS Teams and Zoom meetings are also a bit more fluid and natural feeling. As for why, one possibility is that my upstream bandwidth went from this:
To this:
It is also possible that the fact that the RT-BE86U is much better than routing versus the ZenWiFi XT8 was could also be playing a role as well. Or it is both at the same time. Or perhaps it’s something else that I am not able to discern. Without going into the weeds to figure it out, it’s hard to say. But I will take any improvements that I can get, no matter how marginal. One thing that I have to say is that I am paying to have 1 Gbps downstream and 750 Mbps upstream from Distributel, and I am getting more than I am paying for by making this change which is great.
Do you have any questions about what I’ve done here? If you do, leave a comment and I will be happy to answer them as doing this was a win for me, and it might be a win for you as well.
Posted in Products with tags Asus on January 23, 2025 by itnerd
What if I told you that I have come across a WiFi 7 router that is both fast and fully customizable? By fast I mean that it is capable of above gigabit speeds over WiFi. And by fully customizable I mean that you can tweak it to match your use case. You’d likely say that I am crazy. But I am not. Meet the ASUS RT-BE86U WiFi 7 Router:
Compared to some routers that ASUS makes, this router is pretty understated. There’s no RGB and only a handful of LEDs which you can turn off if you need to, and the styling isn’t over the top. That means that the wife approval factor will be high if you put this in your house. In fact, my wife saw it and said that “it doesn’t look nearly as gamerish as their other routers.” I should note that the antennas are removable and have a standard connector. Which is handy if you need to replace them.
ASUS has cleverly added the words “WiFi 7” to the venting on the back. Which by the way, there’s a lot of venting on this router. In terms of connections, you get three 2.5 Gbps ports, a 2.5 Gbps and 10 Gbps which depending on the situation can be used for WAN access. A tip of the hat to ASUS for providing such fast ports as that’s a form of future proofing this router. A USB 3.0 port and a USB 2.0 are present for things with external hard drives and printers on the right, on the left is the reset button, power connector, and on/off switch.
On the left is a WPS button.
On the right is the button that turns the front LEDs on and off.
In terms of bands, here’s what you get:
2.4GHz: up to 1032 Mbps
5GHz: up to 5764 Mbps
Now some of you are likely saying “where’s the 6 GHz band?” The fact is, you don’t need that band to do WiFi 7 as the WiFi 7 standard can take multiple bands and put them together to get crazy speeds. That functionality is called MLO and you can read about it here. Also, omitting that band likely helps to keep the costs down. Another thing to point out is that a router with Wi-Fi 7 generally improves speeds across all bands. Finally, there’s only a handful of WiFi 7 devices out there at the moment. So for most people, having no 6 GHz band is a non issue.
Setup is easy. You can use the ASUS app to set things up. Or if you’re like me, you can use the web interface which gives you way more options to play with. Most people should go the app route as that’s the easiest path to getting this working for most people. If you own another ASUS router, you can also back up the configuration from that router, and load it into this one and be up and running in minutes. For my testing, I set it up as a new router with the default settings.
In terms of speed, well let’s say I was impressed. Let’s start with its ability to deal with a PPPoE connection. Which is what ISPs like Bell or Distributel offer its customers. This is important to yours truly as most consumer routers have huge problems dealing with PPPoE traffic, resulting in speed being left on the table because the router can’t handle it. That’s not the case here. My connection is apparently 1 Gbps downstream/750 Mbps upstream via a fibre link and this is what I get over my Asus ZenWiFi XT8:
Now this is what I get with the ASUS RT-BE86U:
In short, ASUS has clearly built a router that is built to handle the most demanding connections. And a PPPoE connection would qualify as demanding because of the overhead that PPPoE has.
But the speed doesn’t stop there. I did a speed test from my iPhone 14 Pro standing about 10 meters away. Yes, this is a WiFi 6 device. But it will illustrate something that I said earlier, which is WiFi 7 improves speed on all bands. In this case the 5 GHz band. Once again I will start with a speed test from the ASUS ZenWiFi XT8:
Now let’s look at the speed test from the ASUS RT-BE86U:
What this means that even if you don’t have a single WiFi 7 device in your home, you will get better performance on WiFi. I’ll go one step further. I have a Mac mini with the M2 Pro processor. And that Mac has WiFi 6E. Let’s see what speed you get from the XT8 for starters:
And now from the RT-BE86U
The Mac mini on WiFi 6E came close to maxing out my connection. Thus I believe you can call this router fast on all fronts. And if I had a faster Internet connection, I would see faster numbers from all my tests.
Now ASUS could have stopped there. But there’s a number of things that I would like to point out that add even more value to this router beyond speed:
You can use the 10Gbps as the WAN port, or switch the WAN port to the 2.5Gbps port. Whatever port that is the non-WAN port will function as a LAN port.
You can use the router in a dual-WAN setup so that you have access to more than one Internet connection. Either to combine the links or have a backup Internet connection on standby.
You can use the USB port as a third WAN source to host a tethered smartphone or cellular modem for emergency situations.
It supports AI Mesh which allows you to create a mesh network with one or more supported ASUS routers.
It has built-in Parental Controls and online protection as part of their AiProtection suite that is supplied by Trend Micro. This suite is free forever which is a significant difference between this router (or any ASUS router for that matter) and other brands of router which make you pay extra for this functionality as part of a subscription of some sort.
For a limited time you can get a complementary twelve month or six month NordVPN subscription when you buy an ASUS router. More info here.
Though it’s not advertised as a gaming router, it does have a broad amount of gaming specific features that will make gamers happy.
There’s one other thing that I’d like to point out. ASUS routers are very customizable. If I need to tweak a setting, I have the ability to do so. That’s something a lot of consumer routers do not let you do because they hide so much of what you can do. This level of customization is great for advanced users like me as there have been times I have had to use a really obscure setting to fix an issue with a unique WiFi device. Or using a router like this with Distributel fibre internet service which requires the router to be set up to use VLAN 40 to connect to the Internet. All of that means that you can use this, or any other ASUS router in more unique use cases where other brands of routers would fail in.
MSRP is $409.99 CAD. Now that I will admit is more expensive than its competition. But here’s my argument on that. If you combine the performance that this router has, the extra value that I outlined in the bullet points above that doesn’t cost you anything extra, and the fact that you can customize it six ways from Sunday for whatever unique use case that you have, this router is a winner. Take a good look at it if you want to dip your toe into the world of WiFi 7.
Posted in Products with tags BenQ on December 29, 2024 by itnerd
I’ve had a number of requests to do a follow up review of the BenQ MOBIUZ EX321UX Gaming Monitor to find out if I still had positive feelings about it. Well, the short answer is yes. The long answer is a bit more complicated. Let’s start with the fact that the get the most out of this monitor, you need to update the firmware. BenQ has shipped five versions of their firmware according to their US website. But in reality, they got a sixth one that they haven’t documented anywhere except in this Reddit thread. While that’s an area that they clearly need to improve upon, their firmware have improved in areas like the USB hub functionality, display flickering. The latter I noticed if I was going from a really dark screen to a light one. The other thing that I should point out is if you use the KVM functionality, you should apply the KVM fix as that fixes a very persistent issue that has been around for users since day one and is described in this Reddit thread. Now I never noticed this as I don’t use that functionality, but I am glad that BenQ has addressed this.
Now one side effect of the firmware updates is that this monitor now seems to support EDR which is Apple’s implementation of HDR. In short, EDR or Extended Dynamic Range is a holistic approach that gives developers and content creators a clear-cut idea of how to achieve the best HDR results on Apple hardware, software and services. The main advantage of this is that this display seems to behave like Apple’s own monitors like the built in XDR display on my MacBook Pro where HDR content can be side by side with SDR (Standard Dynamic Range) content and both look perfectly fine. That’s another huge plus for this monitor.
Is there anything that I would change? Well, if BenQ is reading this, I would like to have the next iteration of this monitor support 10Gbps USB-A and C rather than the 5Gbps that it supports now. That would make it better for people like me who use this monitor as a USB hub.
I’m pretty happy with this monitor and I look forward to using it for years to come. Or whenever Apple decides to put out a monitor that supports ProMotion or Variable Refresh Rates and HDR. Whichever comes first. Until that monitor appears, this one will be on my desk.
It’s been a couple of years since I last did an overview of my home office setup. And since then, I’ve made a fair amount of changes that I would like to cover here. Now unlike the last time where I pretty much blew up my home office and did it from scratch, this is more of an evolution. Let’s start with the cable management.
Underneath the desk I use a combination of stick on cable clips and cable raceways to keep all my cables under control. I also moved the power bar that was on the left leg of the table to underneath my table. Then I route a few small power bricks that power some items on my desk along with the power brick for a wireless charger that is built into my desk to it.
That results in the only two cables being visible. A Thunderbolt 4 cable at the top and a power cable for my desk phone at the bottom. The former is like that to accommodate the desk moving up and down as it is a standing desk. More on the desk later. I really want to do something about the white wall as I’ve repainted it a year ago and it’s looks like this. But I am still trying to work out what exactly to do.
All of the cables route down a stick on cable raceway on the right side of the desk.
Then they get bundled up and plugged into an APC BackUPS 600. In my condo, I have UPS units all over it to protect my various electronics as a UPS or Uninterruptible Power Supply will keep your gear running if there is a blackout thanks to the built in battery. Plus it will protect you from power surges (too much current) and sags (too little current) thanks to said battery. It also has a USB-A cable that connects to your computer so that if the UPS needs to shut down your computer due to a power event, it can use that cable to send that command to your computer. Though I should point out that UPS based shutdown doesn’t work on portable Macs. Which is still fine for me as it still protects my gear. The white cable is the power bar that you saw earlier. I don’t plug the power bar into the UPS as you should never do that due to the fact that it can confuse the UPS and not deliver the level of protection that it should.
On the back of my monitor stand, I am using a bunch of stick on cable clips to keep the cables under control. On top of that, there’s a USB-A hub on the back to plug all my gear that does USB 2.0 speeds into so that I can feed one cable to one of the USB-A ports on my monitor. There’s a second USB-A port on my monitor that has a memory card reader plugged into it as it runs at USB 3.0 speeds. That way all devices can run at the best speed possible. I will touch on the gear that is plugged in here in a moment.
Moving up is a Gry Mattr Three Drawer Cabinet that I got at Staples. On top of it is a plastic tray from Amazon and most of my every day carry stays in here when it’s not in my pockets. I can push it out of sight, but still have easy access to it. And as a bonus, none of these items occupy any desk space which reduces clutter on my desk. There’s a second smaller tray from Amazon which holds my AirPods Pro, the Taotronics SoundLiberty 79, and the Creative Outlier Air V3 earbuds along with the receiver for a set of over the ear headphones that I will touch on later.
On the left is an Alex drawer from Ikea. I used to have a pair of Ikea Kallax shelves with drawer inserts. but I gave one to my wife and got the Alex drawer instead. You can see the other one just to the left of the drawer unit. The Alex drawer holds more stuff, and at the same time it opens up space for this.
I now have my desk phone along with my 16″ M1 Pro MacBook Pro located here in clamshell mode. After 2 keyboard replacements under AppleCare, I didn’t really want to have a third one. Thus I have reconfigured my desk to allow me to use an external keyboard. If you look at the right corner of the MacBook Pro right next to the speaker, there’s a cable clip where I put the Thunderbolt cable that connects the MacBook Pro to my Monitor. It’s a single cable connection that supplies power and connects all my desktop gear to my monitor as the monitor acts as a USB hub for me. The MacBook Pro sits in a Ugreen Laptop Stand that I have stuck double sided tape to it as a means to ensure that it doesn’t move.
Above all of this are a pair of hooks which are attached via 3M Command Strips where I store this Panasonic headset for my desk phone on the left, and the HyperX Cloud Stinger 2 Wireless Headphones that are intended for gaming, but I will sometimes use for Zoom or Teams calls.
Now we get to what’s on top of my desk. I use the Apple Magic Keyboard With Touch ID And Numeric Keypad along with the Apple Magic Trackpad which has a decal on it to break up the all black theme that I have going on here. Even though I have been known to swap the track pad out with the Kensington Pro Fit Ergo Vertical Wireless Mouse from time to time, I keep coming back to the trackpad as I find the trackpad to be easier to use for me. I also use a generic wrist rest from Amazon to ensure that I don’t get carpal tunnel syndrome. Above that are a pair of Creative Pebble Pro Minimalist 2.0 Speakers which are plugged into the audio jack at the bottom of the monitor. You can’t see the speaker cable in this picture, but I will show you how I hid it from sight in a moment. Also on the desk is an Apple Watch charger that’s mounted to this Spigen stand that sticks to my desk without using adhesive. Besides that is an Apple MagSafe adapter that is in a Elago MagSafe Stand that also allows my iPhone to work in Standby Mode. I do have to admit that the white cables from both of those items bug me. Thus I wish that Apple would make them in black or grey to complement my dark themed setup. To the right of that is a Ugreen memory card reader that comes in handy whenever I have a need to do something with a memory card. The problem with having a black desk is that it picks up fingerprints and dust is an issue. To mitigate some of that, I got this desk mat from a Toronto company called Uncrowned Kings. It’s made of vegan leather, it doesn’t move around on the desk, feels very upscale, and best of all only cost me $21 CDN on Amazon. Unfortunately the company doesn’t seem to be around anymore.
To hide the speaker wire so it is not visible, I swapped out the stock cable from the speakers with this one which is a flat 90 degree angle cable. If I didn’t tell you that it was there, you would never have known. Which means it serves its purpose well.
On the right side of the the desk, I have a number of items. The bottom right corner has an InvisQi wireless charger which is placed under the desk so that I can charge any wireless device that I need to without having a charger take up space on my desk. Behind that, I have a holder for my pens and other items, and my Ember Mug 2 for coffee, A new addition is this desk shelf from Ikea which has everything from Apple Watch bands to random cables in it. You might note that I have a mug in the shelf. That’s the original Ember mug that I got a few years ago as I got the grey one because it holds more coffee. But I keep the black one around in case I really need a coffee fix and the grey one hasn’t been washed or is being charged. I also have a red stapler which is a bit of a shoutout to The Office along with a notebook and some coasters.
Now onto the star of the show which is my BenQ MOBIUZ EX321UX Monitor. It’s marketed as a gaming monitor, but with the fact that it can be used as an USB hub, and has really great HDR performance on top of really great colour accuracy, I bought the review unit that I was sent and have been happy ever since. Instead of using the stand that came with it, I use the Vivo Monitor Mount which takes up very little space on my desk.
On top of the monitor is the Logitech For Creators Litra Glow which acts as a key light for Zoom and Teams calls where I need to be on camera, and the Kensington W1050 Fixed Focus Wide Angle Webcam which is a very good 1080p webcam. Both of those are plugged into the USB hub behind the monitor that I showed you earlier. On top of that, I used double sided tape to mount the camera to the Litra Glow light so that it is a single unit that is easy to adjust when required.
The most important part of an office setup is the chair. And in my case, I am using the ergoCentric tCentric Hybrid Task Chair. Now this isn’t a cheap chair as this particular one cost me $971.50 CDN when I got it. But it’s worth every penny as it is the most comfortable office chair that I have ever owned due to the broad range of adjustability that it offers. Along with the fact that when my back issues act up, I can sit in it, work comfortably and feel marginally better as it is adjusted perfectly to take the stress off my lower back. Take it from me, if there’s one item that you want to spend money on, it’s your chair. Finally there is the desk itself. This is the FlexiSpot Electric Height Adjustable Standing Desk which has the ability to raise or lower at the push of a button. That means that I can dial in my perfect position that is ergonomically correct.
The last item that I want to touch on is lighting which is taken care of via a pair of GE Cync Full Colour Direct Connect Smart Bulbs which are Matter compatible. Meaning that they work with any smart home ecosystem. I use them with Apple HomeKit and dialled in a number of settings to easily increase of decrease the amount of light that I need.
The rest of my home office has remained the same. As in the same networking gear, the same charging station, and the same pegboard from Ikea that I had in my last setup. Thus validating that this latest iteration of my home office is an evolution and not a revelation. I’m open to suggestions as to how that I can make my setup even better. If you’ve got suggestions, please leave a comment and share your thoughts.
Posted in Products with tags Targus on December 25, 2024 by itnerd
This year I needed to replace my laptop bag which I had used since the mid 2000’s and has served me well along with a backpack of the same age that briefly replaced it. I wanted something compact but would not only fit my 16″ MacBook Pro, but would also fit my tech sling. After some research, I settled on something that wasn’t flashy as I didn’t want to stand out with something that would attract attention. My choice was the Targus 15-16 Inch Classic Laptop Backpack, as it had all the space and features that mattered to me.
It has a very classic look to it so it fits my requirement to not attract attention.
On each side is an expandable section for water bottles. I tend to use those for compact umbrellas if I am going out in the rain.
On the back there’s a strap that allows me to slide it over the handle of rolling luggage. That way I am only rolling one thing through an airport. The back along with the shoulder straps have a lot of padding and some mesh to make this backpack comfortable.
The front compartment allow me to put things like a pen, notepad, or whatever else I need to carry with me on a daily basis. There’s also a strap for keys that you can’t see in this picture.
The rear compartment is padded and easily fits my 16″ MacBook Pro along with my tech sling. Plus there’s a couple of pockets for anything else that I might need.
One handy feature is that the rear compartment has zippers with loops in them so you can lock them using a TSA lock for example. That’s a handy feature.
The build quality of the backpack seems very good as I didn’t find anything to complain about like loose threads or stitching that wasn’t quite right. Now I will admit that this backpack might not be the choice for those who need to carry anything and everything as the capacity is just 19L. But for me, this will work because whether I am going across town or on a flight, anything that I need will fit without an issue. I picked this up on Amazon for $61 CAD which is a killer price for a quality backpack like this one. You should have a look at this backpack if it fits your use case.
Posted in Products with tags Ford on December 12, 2024 by itnerd
I’ve written about Ford’s hands free driver assistance feature called BlueCruise before. But I was intrigued by it to such a degree that I approached Ford for the opportunity to try it out for myself. Ford not only said yes to that, but they gave me this to drive for a weekend:
This is the Ford Mustang Mach-E electric vehicle. I’m going to do a full review of it in the coming days. But for right now, I’m going to focus on BlueCruise.
What BlueCruise is designed to do is to allow the car to “sort of” drive itself in certain situations. Specifically, you have to be in what Ford calls a “Blue Zone” which is usually a divided highway that Ford has mapped out and is known to the car via having it downloaded to the car. More zones are being added all the time, so if your highway isn’t on the list, it likely will be soon. Another requirement is that the lanes on said highway need to be clearly be seen by the car’s cameras. Finally, the car via cameras inside the car need to be able to see your eyes so that it can confirm that you are paying attention to the road. That’s where the “sort of” part comes in because the car is basically driving under your supervision.
If you look above the pony on the steering wheel, but below the screen behind the steering wheel, you’ll see a rectangle. That’s where the cameras are located.
Here’s what you do to activate BlueCruise. Assuming the preconditions for BlueCruise to be available are there, and the screen turns blue and lets you know that you’re in a “Blue Zone”, hitting the cruise control button should activate it. And the first time that I tried it, it did. Then it started to complain that I wasn’t paying attention to the road that had a few beeps accompanying that message, and about a minute later the system shut off and the car beeped a lot. My wife was in the car with me at the time and it freaked her out. And this didn’t help her anxiety about being in a car that had this feature. I pulled into a parking lot and readjusted my seating position which was a tip that Ford had given me the day before via a briefing that covered BlueCruise and the Mach-E. I normally have a very upright seating position because I have a dodgy back. But I changed my setup so that I was lower than normal, and I was reclined slightly. After doing that, BlueCruise worked without an issue because it could now see my eyes.
Here’s a video that my wife took of me using BlueCruise for the first time and being completely hands free:
By the way, my wife wanted my hands on the steering wheel because she was super nervous about me driving hands free. Which I get. But we tested this out on a 218 KM drive where 85% of it was on highway 401 or highway 427 and it worked flawlessly. There were a couple of times where the system had me take control without all the beeping that I mentioned earlier. The first was on the eastbound 401 just after Milton where for reasons that I can’t discern, it had me take control just before going under an overpass. Then it re-enabled BlueCruise about 30 seconds later. The second was when a transport truck was beside me and a car was two or three car lengths in front of me. Again, the system had me take control, and then when the car in front of me exited the highway, it took over again. I am guessing that BlueCruise thought that this was a dicey situation and that it might have been better if a human took control of the car. That was interesting because when we got close to Toronto we encountered some traffic and BlueCruise was able to deal with the stop and go traffic that we had to deal with for about 10 minutes. Finally, I should mention that BlueCruise can make lane changes all by itself. Simply hit the signal and the car will do its version of a shoulder check and move left or right for you.
The one thing that I did appreciate is that when I was using BlueCruise, I was actually less stressed. I am pointing this out because going into this, I was assuming that because I had my hands off the wheel and I was using the system, I was going to be on alert the entire time. But the opposite happened the more I learned to trust the system and understand how it worked. On a long drive like a road trip, I can see how this could be be serious quality of life improvement. My wife became more comfortable with me using the system as well. Though she’s stated to me that if we owned this car, she’d never use it as she wants to be in complete control of the car at all times. Which is fair and not surprising to me as she’s never used the cruise control feature of our daily driver as she doesn’t trust that either. But I am thinking that if she had some seat time with BlueCruise in what she perceived as a “low risk” situation, she’d change her mind. Another thing that might help her to change her mind is the fact that Consumer Reports has had BlueCruise as the top-ranked active driving assistance system twice in a row out of 17 systems tested. So if it’s good enough for Consumers Reports, it’s likely good enough for you, and her.
My only gripe about BlueCruise is the fact that I had to alter my driving position to get it to work. While doable, my back wasn’t really a fan of that position by the end of the weekend. But I’m likely an edge case in that regard. Having said that, it would be nice if Ford made the eye tracking system a bit more flexible so that I didn’t have to change my position.
Ford has given you options in terms of how you can get BlueCruise:
Any new purchased or leased Ford vehicle will come with a 90 day trial of BlueCruise.
There is a one-year plan which will either be included standard or as an option based on the vehicle line and trim.
Starting on select 2025 model year vehicle lines, Ford customers can choose to upgrade to a one-time purchase at vehicle order and won’t need to activate BlueCruise again on their vehicle. And this activation will stay with the car, which adds value to the car.
You can activate BlueCruise on a month to month basis. For example, you could activate it for a road trip and then have it turned off when you get home.
And here’s a list of Ford vehicles that BlueCruise is currently available on:
Ford Explorer
Ford Expedition
Ford F-150
F-150 Lightning
Mustang Mach-E
My verdict is that if you’re looking at a Ford vehicle, you should try out BlueCruise. I think that once you try it and trust it, you’ll find it an indispensable aid when you’re in the car for long periods of time.